
How to Create an AWS EC2 Instance
Steps to Create AWS EC2 Instance
The following procedure is intended to help you launch your first AWS EC2 instance in Amazon Console with define all option with screenshots.
First you need to signup in on AWS by visiting this site http://aws.amazon.com/![]() to sign up, it’s free (but running an AMI costs money).
to sign up, it’s free (but running an AMI costs money).
When you sign up for AWS, you can get started with Amazon EC2 for free using the AWS Free Tier. If you created your AWS account less than 12 months ago, and have not already exceeded the free tier benefits for Amazon EC2 and Amazon EBS, it will not cost you anything to complete this tutorial, because we help you select options that are within the free tier benefits.
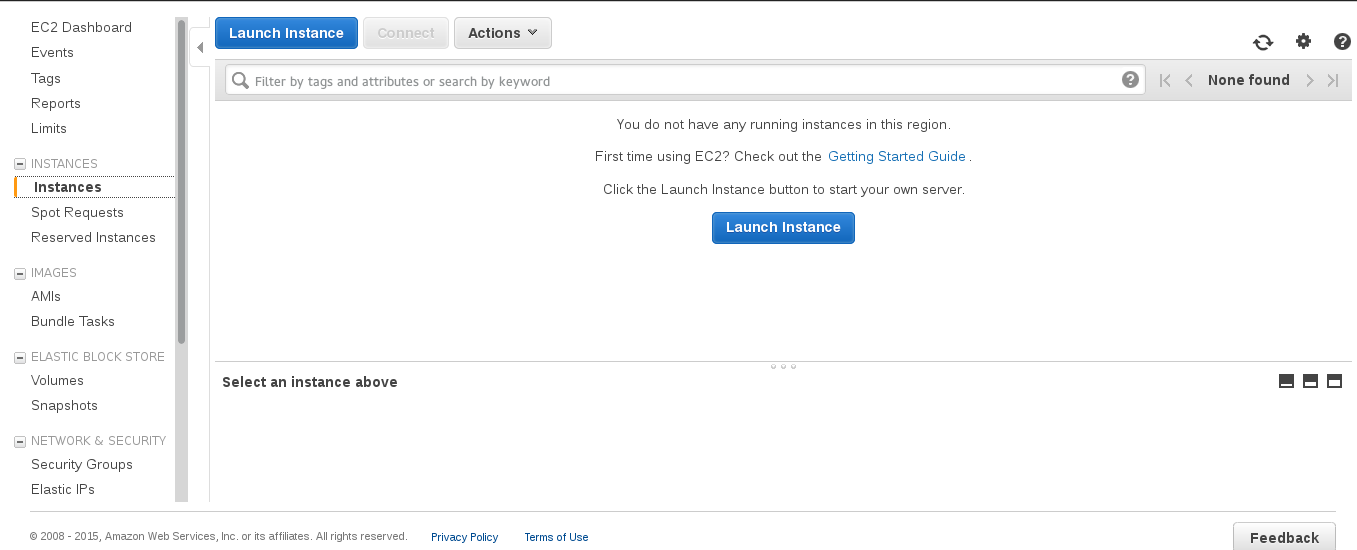
- Next From the console dashboard, click Launch Instance.
- Here you can choose an Amazon Machine Image (AMI) page displays a list of basic configurations called Amazon Machine Images (AMIs) that serve as templates for your instance. We are selecting Ubuntu 64-bit 14.04.

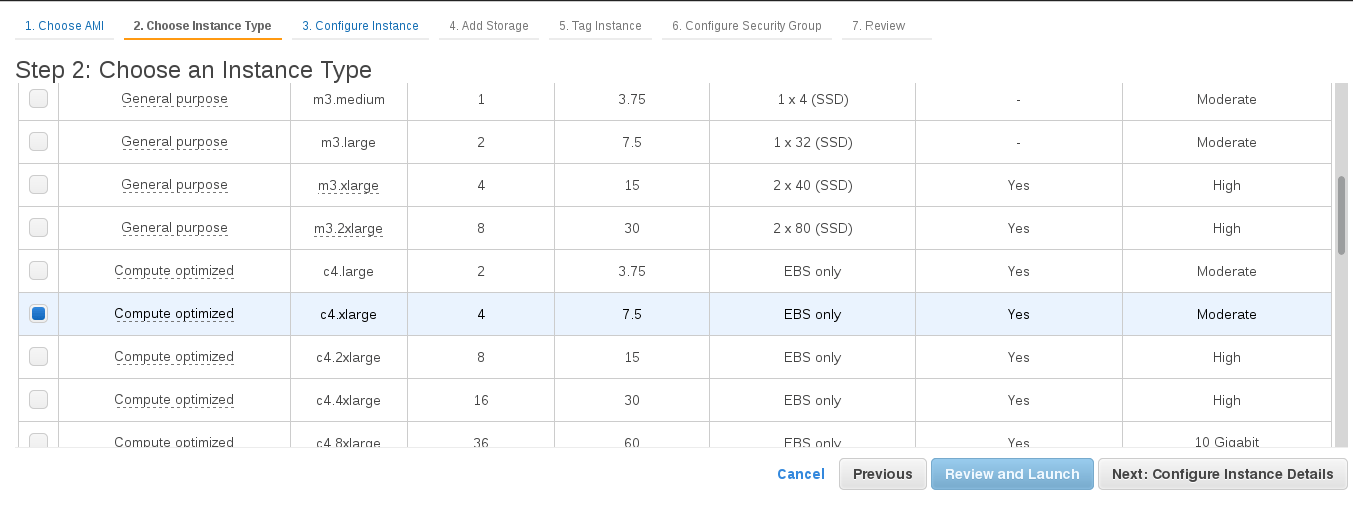
- On the Choose an Instance Type page, you can select the hardware configuration of your instance. The
t2.microinstance type is selected by default. Alternatively, select All generations from the filter list, we are selecting c4.xlarge.
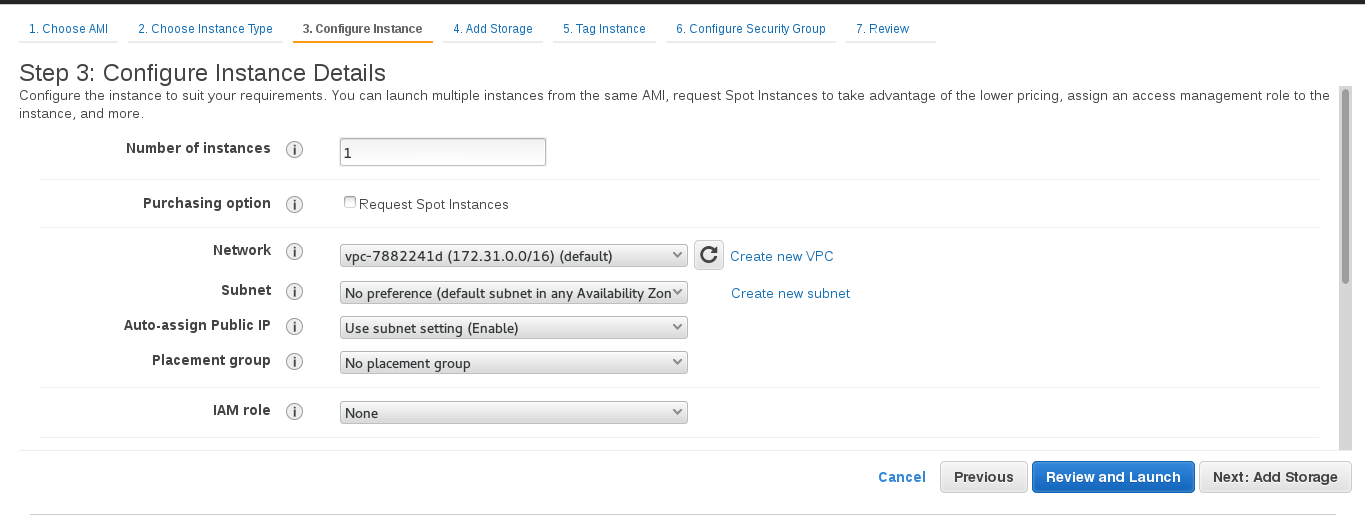
- In the next step you can configure Instance with public IP, Network and Number of instance created.
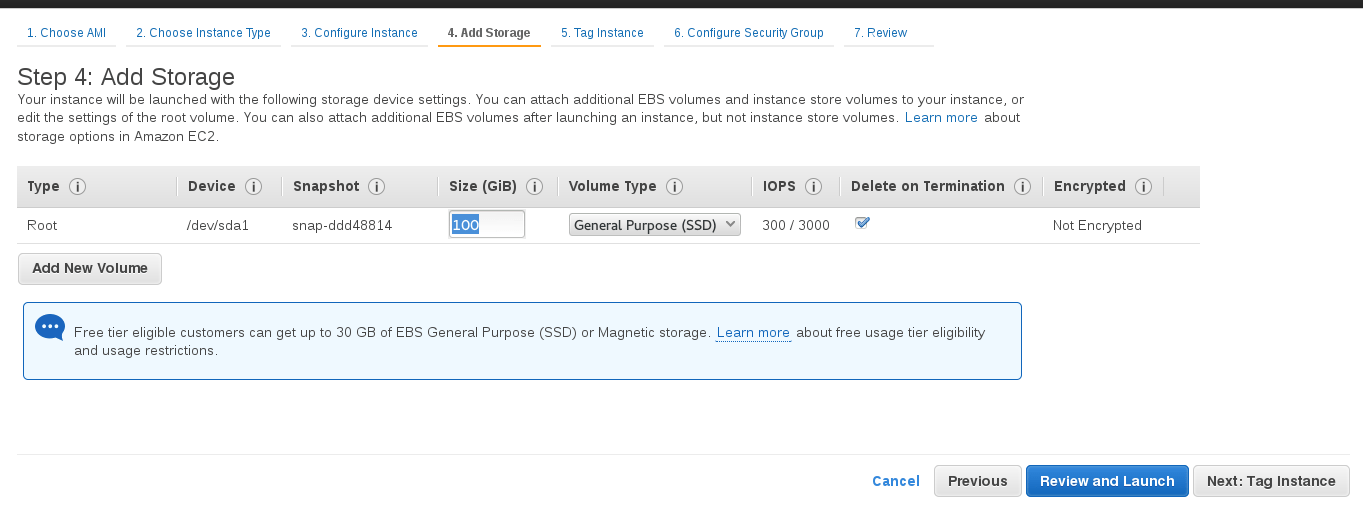
- Next you can add storage space for you instance, it has default 8 GB storage. You can configure as per you requirement.
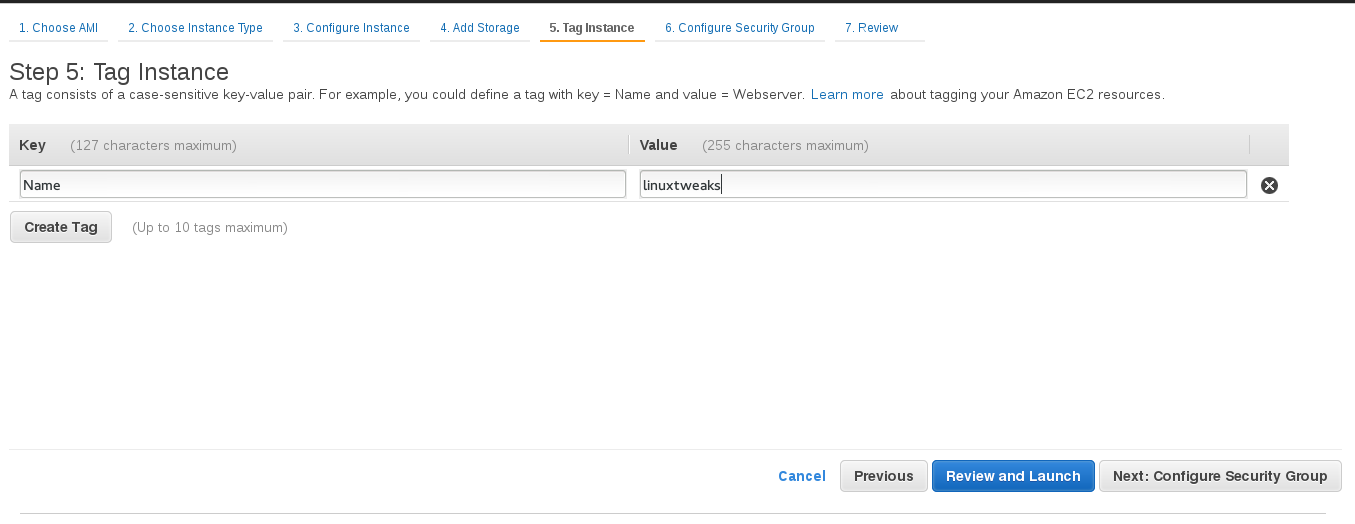
- Next you can tag your instance with name of the instance from it will known.
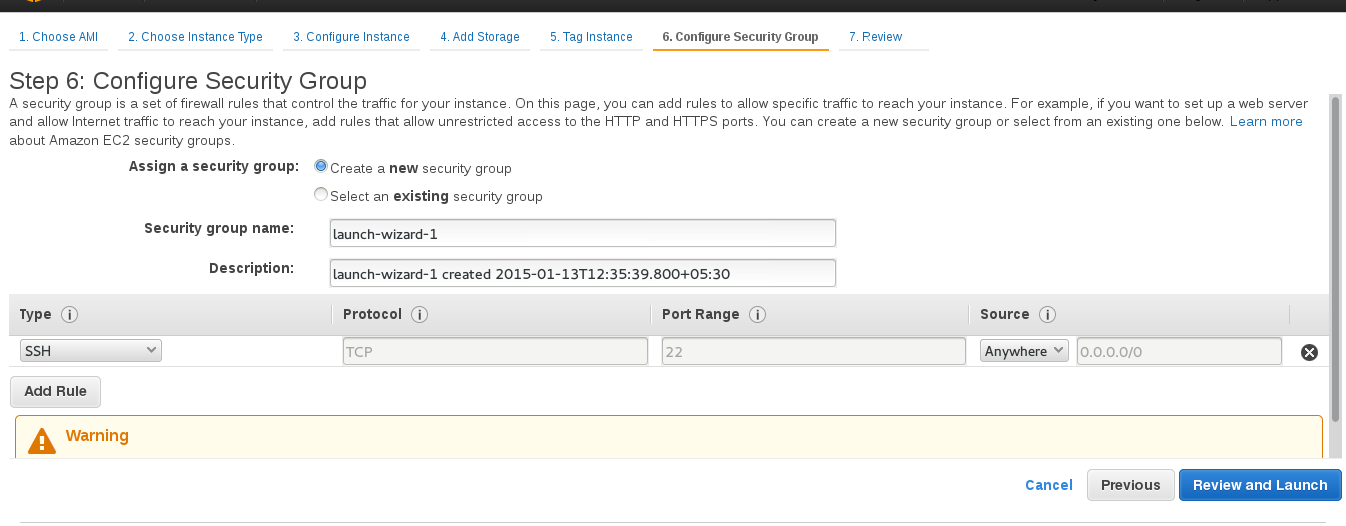
- On the next page you can see Configure Security group for you instance.Create a new security group as it’s first instance or if you have already created security group you can choose it from here.
- Give it a name for the security group
- Open connection like http/https/ssh port for defined ip or for the world.
- By default ssh is open for the world.
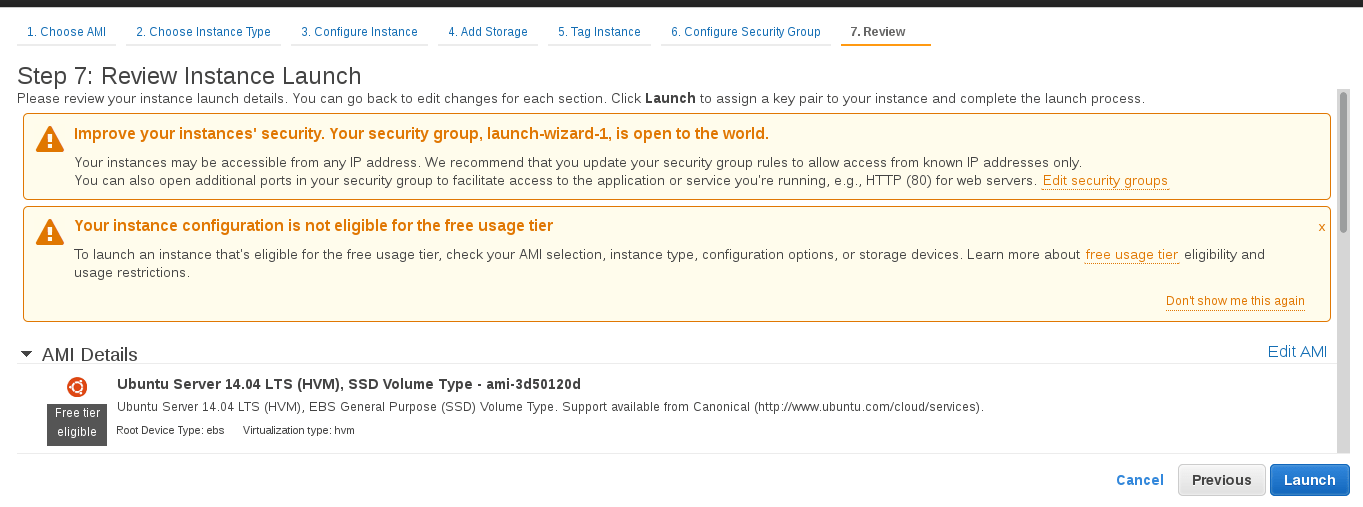
- This is the final step for create an instance. Here you can review your selected option and can change it before launching your instance.
- When you launch you instance it will ask for key pair creation for login into your newly created instance using ssh. In the Select an existing key pair or create a new key pair dialog box, select create a new key pair, then give it a name for your key and create the key pair and then click Download Key Pair. This is the only chance for you to save the private key file, so be sure to download it. Save the private key file in a safe place. You’ll need to provide the name of your key pair when you launch an instance and the corresponding private key each time you connect to the instance.Alternatively, you can choose existing key pair if you have already created key pair.
A key pair enables you to connect to a Linux instance through SSH. Therefore, don’t select the Proceed without a key pair option. If you launch your instance without a key pair, then you can’t connect to it.
When you are ready, select the acknowledgment check box, and then click Launch Instances.
- A confirmation page lets you know that your instance is launching. Click View Instances to close the confirmation page and return to the console.

- Now you can go to your instance page where you can see your newly created instance. This will also shown your instance public ip from which you can connect to using ssh.

On the Instances screen, you can view the status of your instance. It takes a short time for an instance to launch. When you launch an instance, its initial state is Pending. After the instance starts, its state changes to Running , and it receives a public DNS name. (If the Public DNS column is hidden, click the Show/Hide icon and select Public DNS.)


I need help on how to configure this aspect
You can contact me at +91-9636922286 (whatsapp)