Magento Installation Step by Step
What is Magento ?
Magento is a feature-rich eCommerce platform built on open-source technology that provides online merchants with unprecedented flexibility and control over the look, content and functionality of their eCommerce store. Magento’s intuitive administration interface features powerful marketing, search engine optimization and catalog-management tools to give merchants the power to create sites that are tailored to their unique business needs. Designed to be completely scalable and backed by Varien’s support network, Magento offers companies the ultimate eCommerce solution. This article explain how we can done magento installation in Linux/Windows server.
Pre-requisite to Install Magento
Following software packages are required to install on your PC or Hosting server:
- Apache version 2..0.x or newer
- Mysql versionn 5.1 or newer version
- PHP version 5.2.13 or newer with following PHP extension
- Curl
- Dom
- GD
- Hash
- Iconv
- Mcrypt
- Pcre
- PDO
- PDO_Mysql
- SimpleXML
Please check that your server compatible for magento by downloading compatibility script from here and execute on your server.
After successfull upload hit URL: https://www.linuxtweaks.in/magento-check.php on your browser. It will show the compatibily test to install magento on your hosting server.This will show error if you miss any modules or lower version. You will get following screen –

If it is showing error then you need to contact your hosting support team to get all compulsory extension to install magento if you have server access then do the needful.
Magento installation step by step
Step 1. First you need to download the latest version of the magento from magento website download section. I will recommend you you to download full release.
$ tar xvzf magento-xxx.tar.gz -C /var/www/
$ chown -R apache.apache /var/www/
Step 2. Create Database for Magento Site (Magento Installation)
Go ahead and log into the MySQL Shell:
mysql -u root -p
Login using your MySQL root password. We then need to create the Magento database, a user in that database, and give that user a new password. Keep in mind that all MySQL commands must end with semi-colon. We can also configure this new database with root user but this is not a good option for security and when you have multiple sites on a server.
First, let’s make the database
CREATE DATABASE magento;
Query OK, 1 row affected (0.00 sec)
Then we need to create the new user. You can replace the database, name, and password, with whatever you prefer:
CREATE USER linuxtweak@localhost;
Query OK, 0 rows affected (0.00 sec)
Set the password for your new user:
SET PASSWORD FOR linuxtweak@localhost= PASSWORD("password");
Query OK, 0 rows affected (0.00 sec)
Finish up by granting all privileges to the new user. Without this command, the Magento installer will be able to harness the new mysql user to create the required tables:
GRANT ALL PRIVILEGES ON magento.* TO linuxtweak@localhost IDENTIFIED BY 'password';
Query OK, 0 rows affected (0.00 sec)
Then refresh MySQL:
FLUSH PRIVILEGES;
Query OK, 0 rows affected (0.00 sec)
Exit out of the MySQL shell:
exit
Step 3. Configure Apache (Magento Installation)
Point your domain to this server ip and configure apache by editing below file.
# vi /etc/httpd/conf/httpd.conf
ServerAdmin [email protected]

ServerName linuxtweaks.in:80
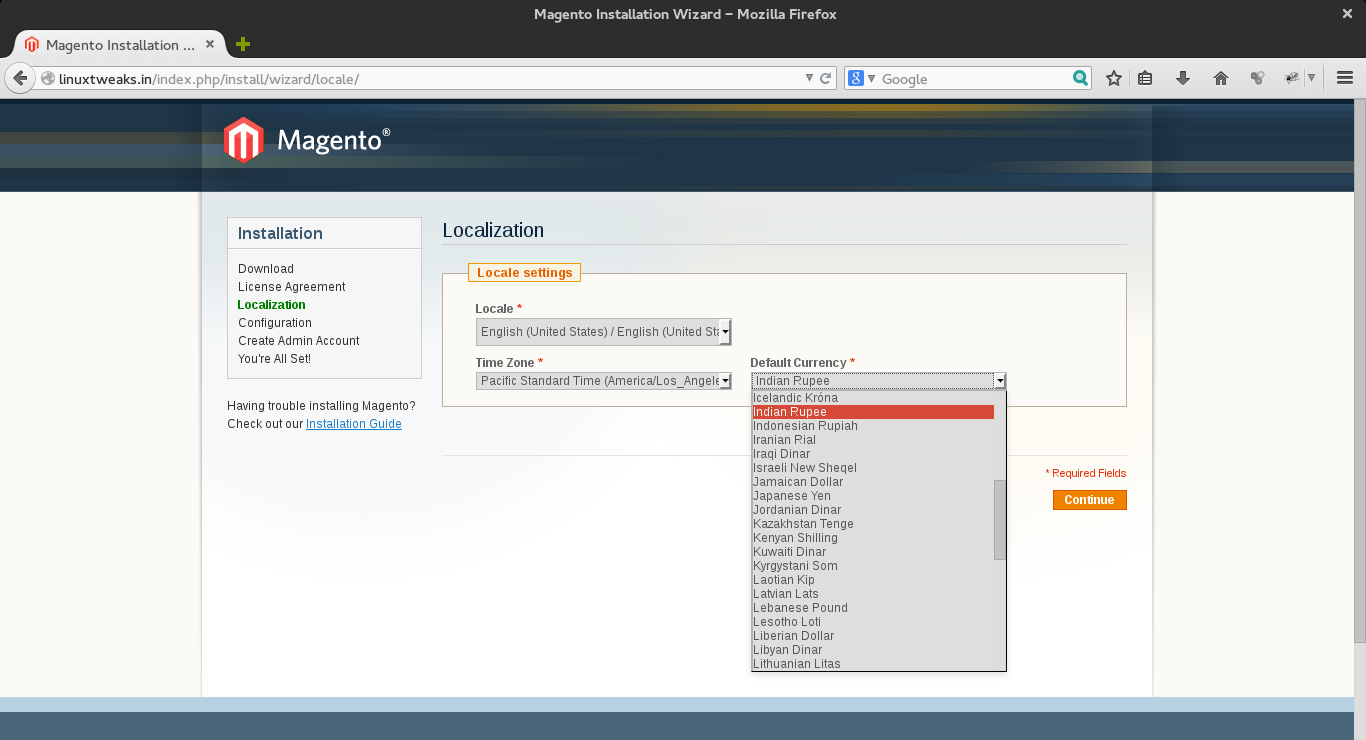
.Step 4. Enter from browser hit your website like https://www.linuxtweaks.in/ then one window display as seen below (Magento Installation).
Now, Continue with the following procedure.
- click on check box and continue button to display next window as seen below.

- click on continue button to display next window as seen below.
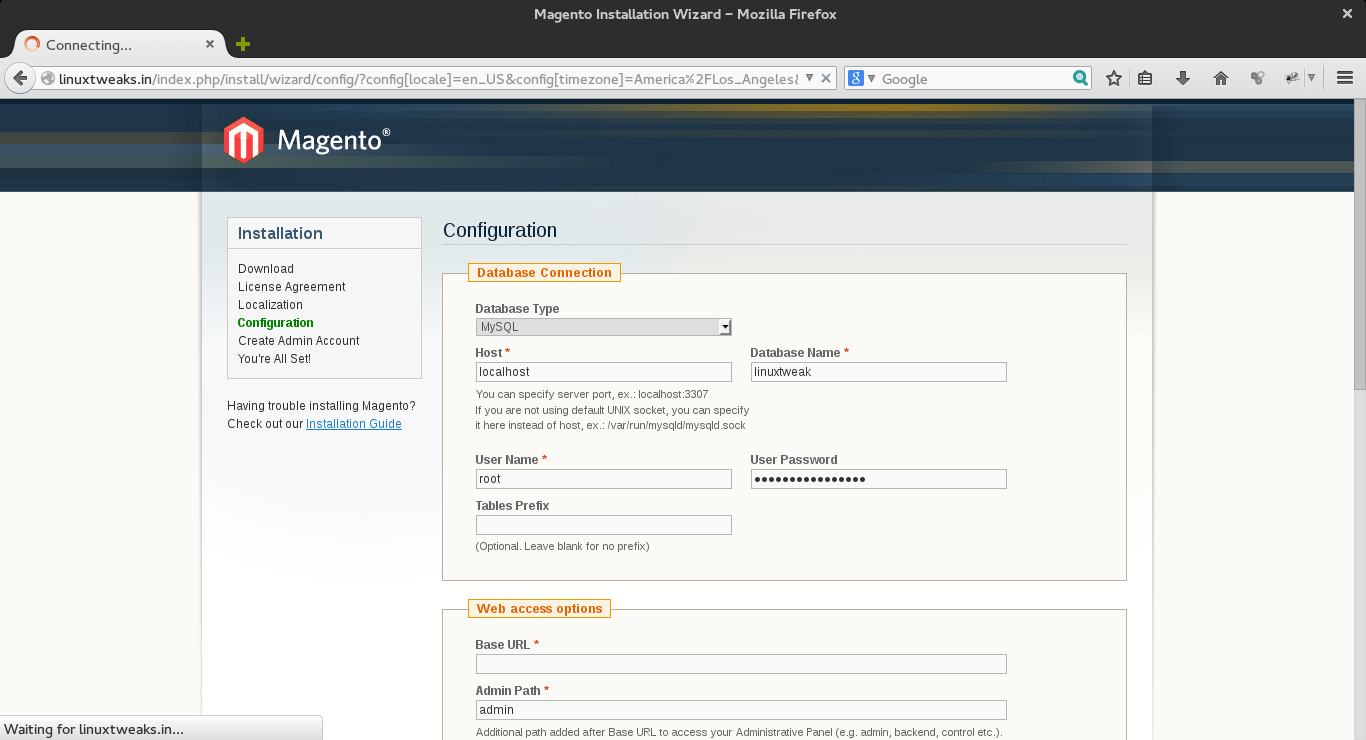
- Enter your Database Type,Host,Database name,Username and password is not mandatory as seen below this process takes few minutes.
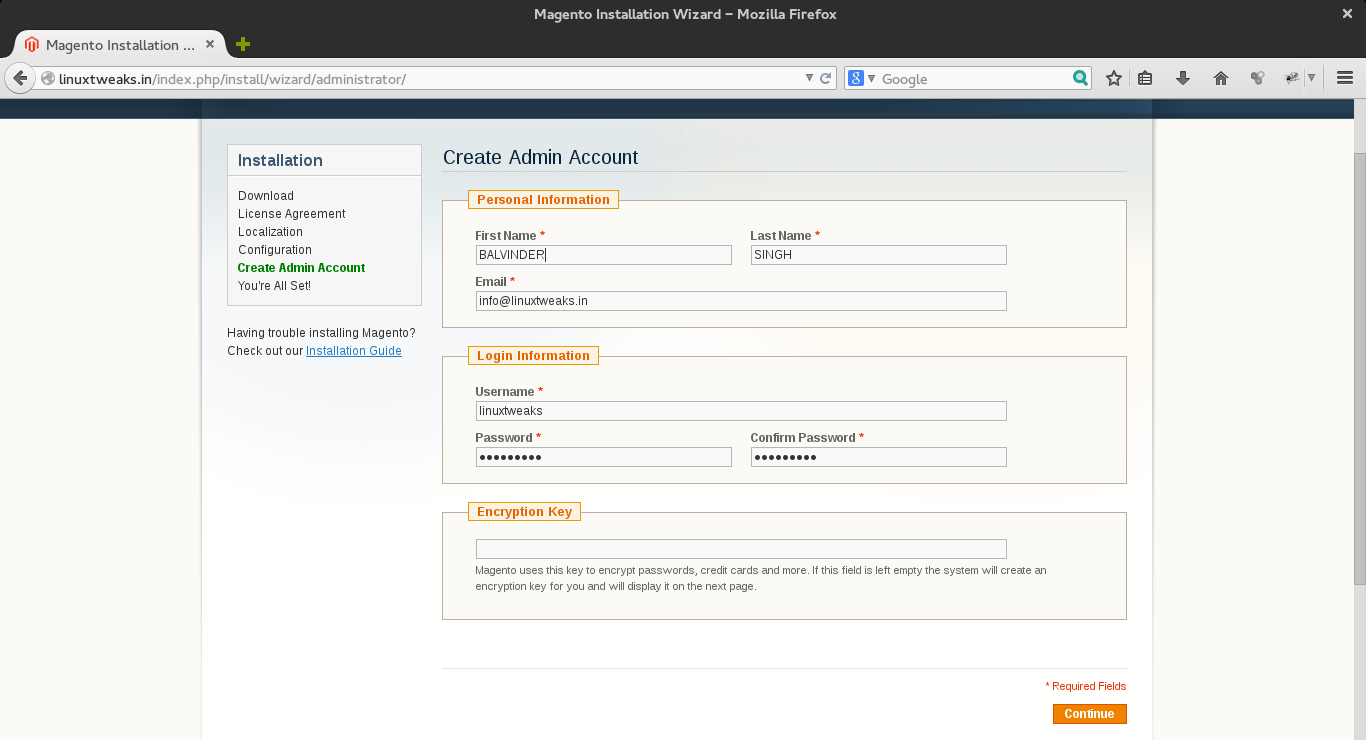
- After Entering all information Click Continue button to display next window, where you can enter personal information and login information as seen below.
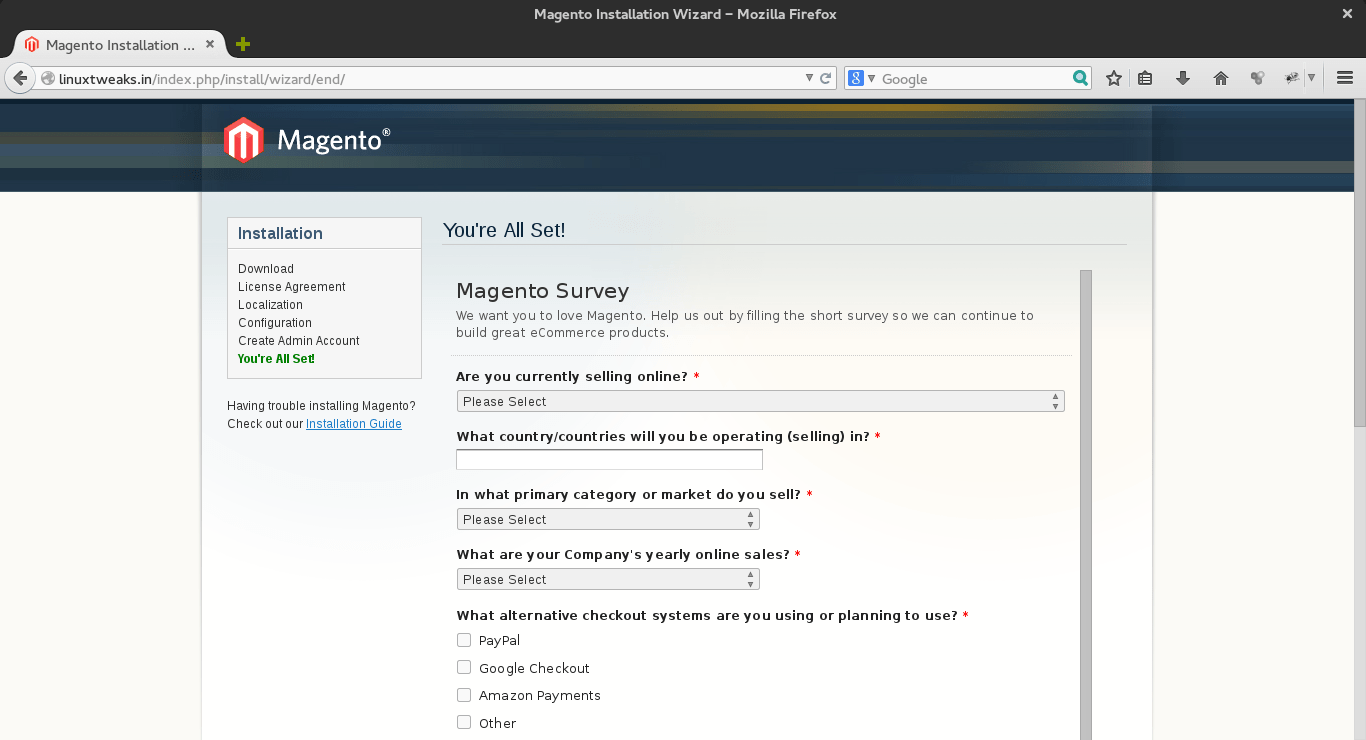
- At last you see tha last window “You’re All Set”.
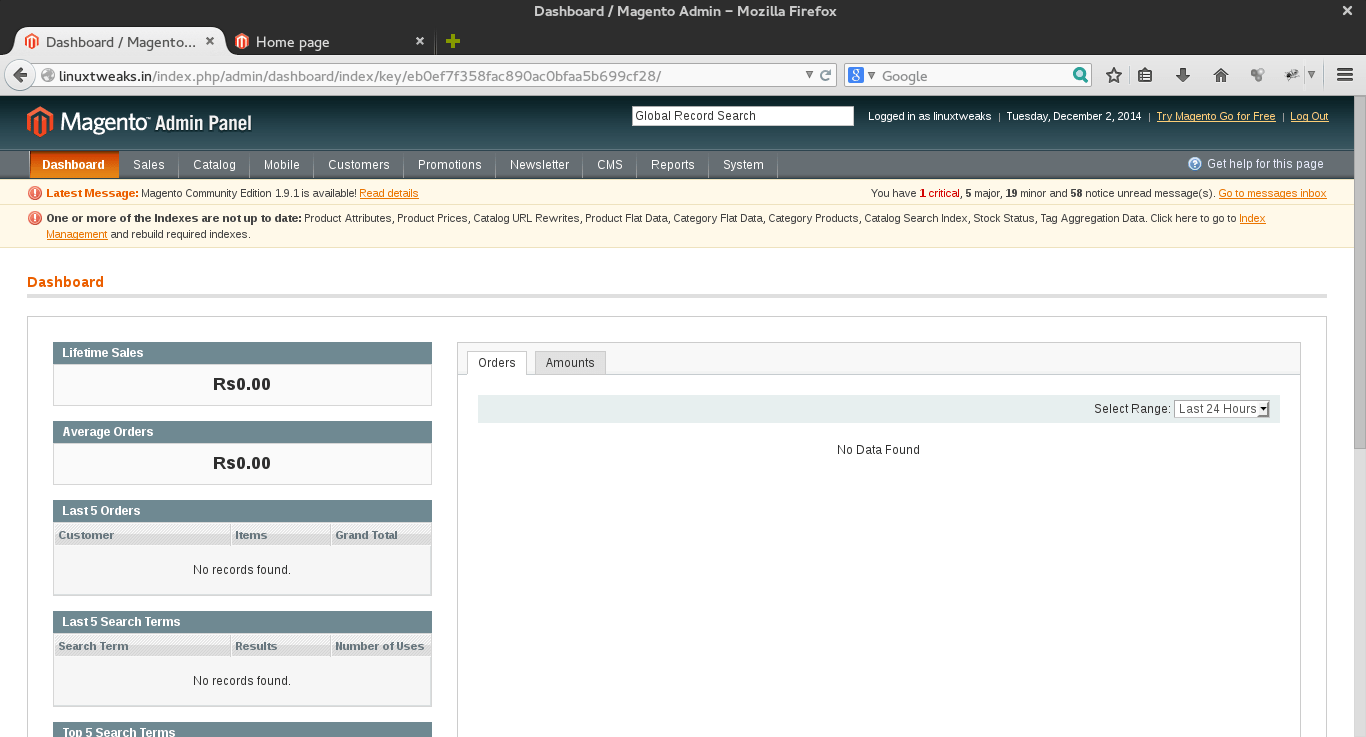
- Click on “Go to Backend” button to go to Magento Admin Panel as seen below.
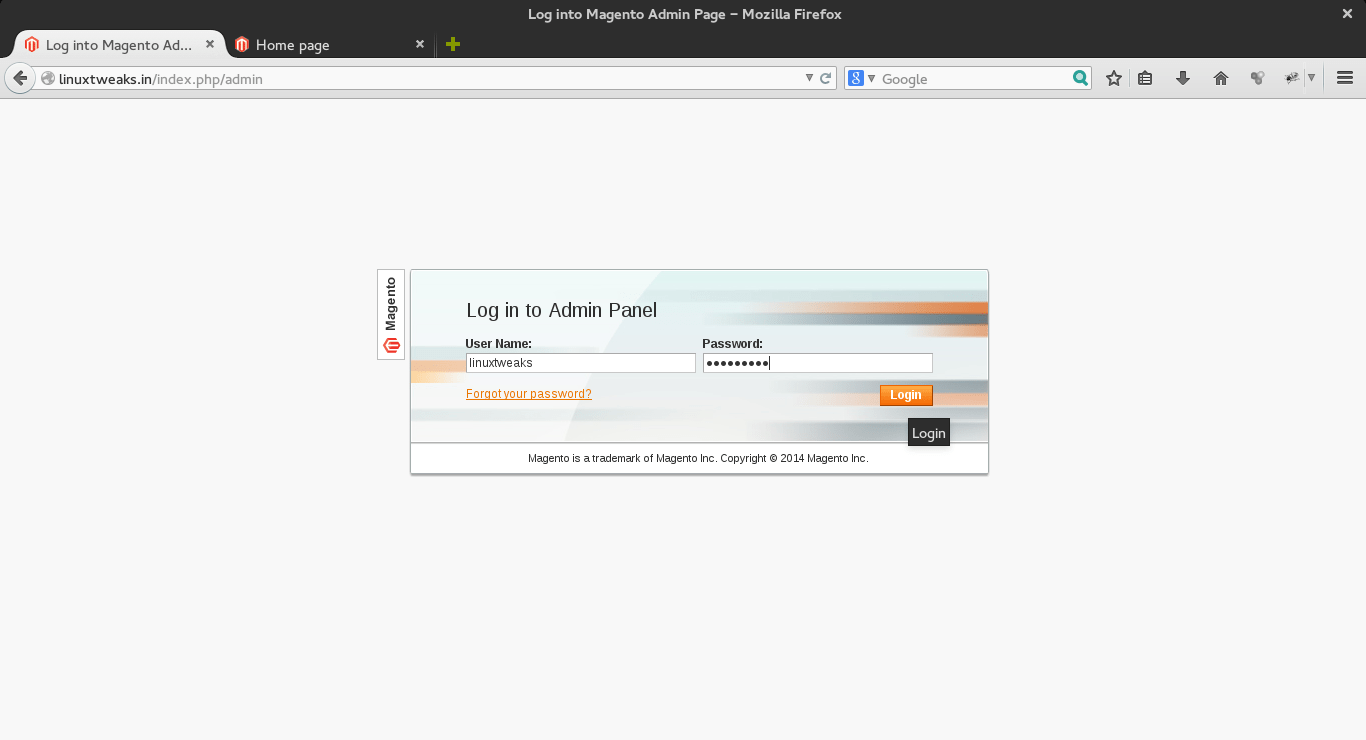
- Enter username and Password to logon to Admin Panel.
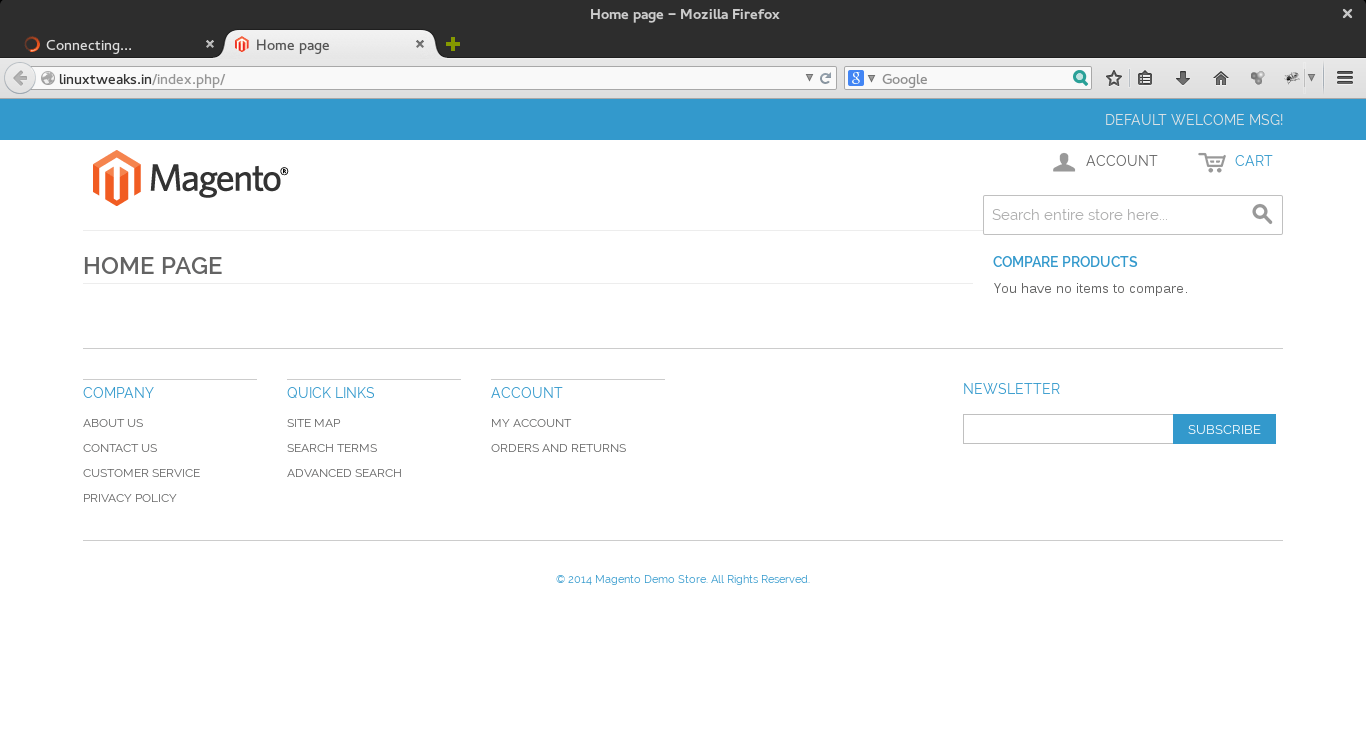
- Click on “Go to frontend” button to go to Magento home page as see below.
5. Set Permission on Magento Files and directories for properly run your site(Magento Installation).
$ cd /var/www/
$ find . -type f -exec chmod 400 {} \;
$ find . -type d -exec chmod 500 {} \;
$ find var/ -type f -exec chmod 600 {} \;
$ find media/ -type f -exec chmod 600 {} \;
$ find var/ -type d -exec chmod 700 {} \;
$ find media/ -type d -exec chmod 700 {} \;
$ chmod 700 includes
$ chmod 600 includes/config.php
Congrats !!! your magneto installation has been completed, Now login with your provided credentials at the time of installation.
View more posts in this category !!!
WordPress Installation Guide Step by Step