Install Nginx, MySQL, PHP (LEMP) in Ubuntu 14.04/13.10/12.04
Steps to Install Nginx, MySQL, PHP (LEMP) in Ubuntu
Introduction
LEMP stack is a group of open source software to get web servers up and running. The acronym stands for Linux, nginx (pronounced Engine x), MySQL, and PHP. Since the server is already running Ubuntu, the linux part is taken care of. Lemp Represents Linux operating system with the Nginx web server and hosted site data is stored in a MySQL database and dynamic content is processed by PHP.Here are steps how to install Nginx, Mysql, PHP (LEMP) in Ubuntu server while the most of the same process can use for Centos.
In this guide, we’ll get a LEMP stack installed on an Ubuntu 12.04 and above. Where Ubuntu is an Linux Operating System which cover first requirement of LEMP Stack. There are different ways of installing packages/software in Linux Operating System from package manager, from Source, using binary files.
Here we will cover LEMP Installation using Ubuntu Package Manager,apt. A package manager allows us to install most software pain-free from a repository maintained by Ubuntu.
Install Nginx
Nginx (pronounced as engine-x) is a free, open-source, high-performance HTTP server and reverse proxy, as well as an IMAP/POP3 proxy server written by Igor Sysoev.
To install Nginx enter the following command in your terminal:
Note: If you have already installed apache2 in your system, remove it first to avoid conflicts. To uninstall apache, run the following commands:
sudo apt-get purge apache2*
sudo apt-get autoremove -y
Now, install nginx using command:
echo "deb http://ppa.launchpad.net/nginx/stable/ubuntu $(lsb_release -sc) main" | sudo tee /etc/apt/sources.list.d/nginx-stable.list
sudo apt-key adv --keyserver keyserver.ubuntu.com --recv-keys C300EE8C
sudo apt-get update
sudo apt-get install nginx
nginx does not start on its own. To get nginx running, type:
sudo service nginx start
You can confirm that nginx has installed an your web server by directing your browser to your IP address or by check status.
sudo service nginx status
Output as follow :
Nginx is running (pid xxxx).
You can check right away to verify that everything in working condition by visiting your Lan Ip or server’s public IP address in your web browser.
Open your web browser and navigate to http://localhost/or http://server-ip-address/.
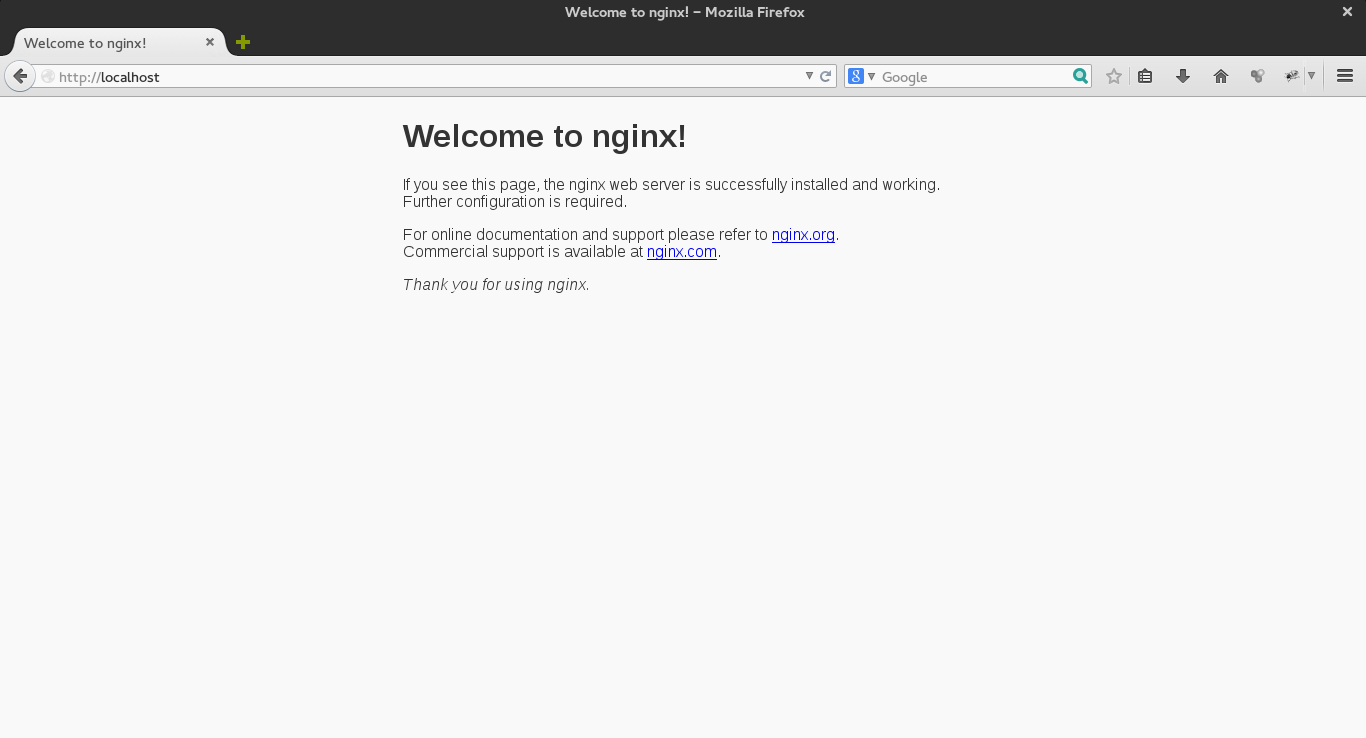
If you see this page, then your web server is now correctly installed.
Install MySQL
We have our web server up and running now it’s time to install MySQL for organizing our website information and provide access to database with their stored information.
Install Mysql server by typing the below command in terminal . This command will install mysql-server and mysql-client along with dependencies .
sudo apt-get -y install mysql-server mysql-client
During the installation, your server will ask you to enter password for the MySQL “root” user and confirm it. This is an administrative account in MySQL that has full privileges. This is similar as root user account of Linux Operating System Server itself.
When the installation is complete, We can verify our mysql server Status by following command.
sudo service mysql status
if output as follows that means mysql server is in working situation.
mysql start/running, process xxx
Our next task is to setup database directory strucuture and mysql environment setup securely.
Following command will create its database directory structure where it will store its information –
sudo mysql_install_db
Our Mysql server is installed and running but our major concern should be to secure also so we have to check the security of mysql server and set it up.This script remove default access permission and checking for root password security.
Note:- Default setup will disable mysql root logins from remote location.
sudo mysql_secure_installation
For the rest of the questions, you should simply hit the “ENTER” key through each prompt to accept the default values. This will remove some sample users and databases, disable remote root logins, and load these new rules so that MySQL immediately respects the changes we have made.
The prompt will ask you for your current root password.
Type it in.
Enter current password for root (enter for none):
OK, successfully used password, moving on...
Then the prompt will ask you if you want to change the root password. Go ahead and choose N and move on to the next steps.
It’s easiest just to say Yes to all the options. At the end, MySQL will reload and implement the new changes.
By default, a MySQL installation has an anonymous user, allowing anyone
to log into MySQL without having to have a user account created for
them.  This is intended only for testing, and to make the installation
go a bit smoother.  You should remove them before moving into a
production environment.

Remove anonymous users? [Y/n] y
 ... Success!

Normally, root should only be allowed to connect from 'localhost'.  This
ensures that someone cannot guess at the root password from the network.

Disallow root login remotely? [Y/n] y
... Success!

By default, MySQL comes with a database named 'test' that anyone can
access.  This is also intended only for testing, and should be removed
before moving into a production environment.

Remove test database and access to it? [Y/n] y
 - Dropping test database...
 ... Success!
 - Removing privileges on test database...
 ... Success!

Reloading the privilege tables will ensure that all changes made so far
will take effect immediately.

Reload privilege tables now? [Y/n] y
 ... Success!

Cleaning up...
Now your Database Server is setup and running. Now we can move to our dynamic content access for our web stores.
Install PHP
To install PHP-FPM, open terminal and type in these commands. We will configure the details of nginx and php details in the next step:
sudo apt-get install php5 php5-fpm php5-mysql
Configure php
We need to make one small change in the php configuration.Open up php.ini:
sudo nano /etc/php5/fpm/php.ini
Find the line, cgi.fix_pathinfo=1, and change the 1 to 0.
cgi.fix_pathinfo=0
If this number is kept as 1, the php interpreter will do its best to process the file that is as near to the requested file as possible. This is a possible security risk. If this number is set to 0, conversely, the interpreter will only process the exact file path—a much safer alternative. Save and Exit. We need to make another small change in the php5-fpm configuration.Open up www.conf:
sudo nano /etc/php5/fpm/pool.d/www.conf
Find the line, listen = 127.0.0.1:9000, and change the 127.0.0.1:9000 to /var/run/php5-fpm.sock.
listen = /var/run/php5-fpm.sock
Save and Exit.
Restart php-fpm:
sudo service php5-fpm restart
Configure nginx
Open up the default virtual host file.
sudo nano /etc/nginx/sites-available/default
The configuration should include the changes below (the details of the changes are under the config information):
UPDATE: Newer Ubuntu versions create a directory called ‘html’ instead of ‘www’ by default. If /usr/share/nginx/www does not exist, it’s probably called html. Make sure you update your configuration appropriately.
 [...]
server {
        listen   80;
        root /usr/share/nginx/www;
        index index.php index.html index.htm;
        server_name example.com;
        location / {
                try_files $uri $uri/ /index.html;
        }
        # pass the PHP scripts to FastCGI server listening on the php-fpm socket
        location ~ \.php$ {
                try_files $uri =404;
                fastcgi_pass unix:/var/run/php5-fpm.sock;
                fastcgi_index index.php;
                fastcgi_param SCRIPT_FILENAME $document_root$fastcgi_script_name;
                include fastcgi_params;
        }
}
[...]
Here are the details of the changes:
- Add index.php to the index line.
- Change the server_name from local host to your domain name or IP address (replace the example.com in the configuration)
- Change the correct lines in “location ~ \.php$ {“ section
Save and Exit
Then restart the services.
sudo service nginx restart
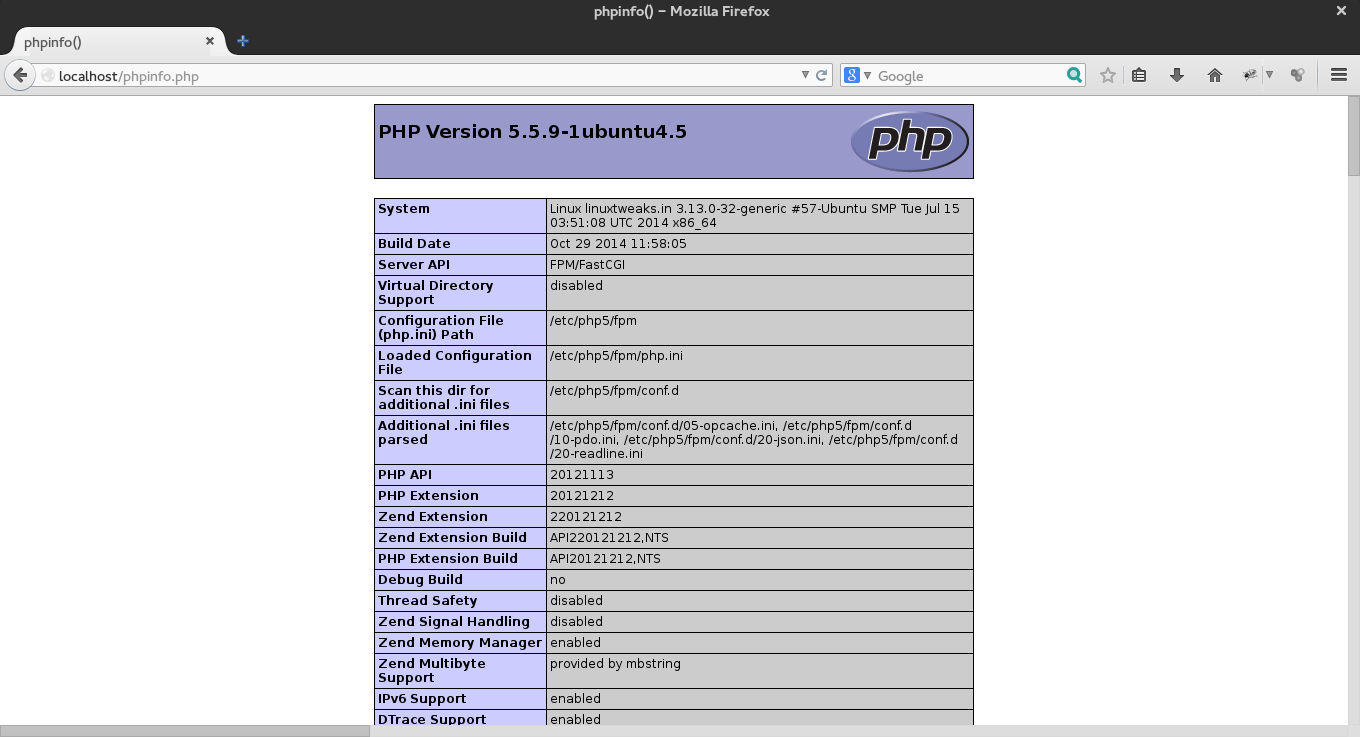
To test if php working with nginx we create test page for it.
sudo nano /usr/share/nginx/www/info.php
Add in the following line:
<?php
phpinfo();
?>
Then Save and Exit.
Open your web browser and navigate to http://localhost/info.php or http://server-ip-address/info.php