How to Install mod_pagespeed in WHM with EasyApache
What is Pagespeed and how to use
One of the more recently popular modules for Apache is mod_pagespeed. It is an output filter for Apache 2.2+ that can be configured through a variety of options through configuration files or a .htaccess file. It makes a layer between your website and the user who browse your websites. An “output filter” is a something that transforms the data before it’s sent to the client.
mod_pagespeed is Google’s answer to these problems. Based on my experience, most shared Web hosting packages do not include the mod_pagespeed module in their Apache configurations. Bluehost for example only offers it in their VPS packages and upwards. As a reseller however, you can make this functionality available to your clients out of the box and improve their page loading times as well as the strain on your own servers. Now that we’ve seen how to configure EasyApache, we don’t need to do a lot of manual work. We simply need to get the module to appear in easy Apache’s configuration screen.
Steps to Install mod_pagespeed in WHM Server
Cloning the Repository
Luckily for us, Git is already installed with WHM. While it hasn’t been added to the environmental path variables, we can run it by specifying the full path. So open up an SSH window, login as a user with the appropriate permissions and type the following:
linuxtweaks ~]#git clone https://github.com/pagespeed/cpanel.git /var/cpanel/easy/apache/custom_opt_mods/Cpanel/
linuxtweaks ~]#cd /var/cpanel/easy/apache/custom_opt_mods/Cpanel/Easy
linuxtweaks ~]#tar -zcvf Speed.pm.tar.gz pagespeed
First we create a clone for pagespeed for cpanel in custom module directory of cpanel. Then change the directory to that custom module path and create a gzip file for pagespeed for cpanel which need to install through cpanel/whm.
Note that so far we haven’t modified in any configuration files or done anything permanent on the server that can’t be undone simply by deleting files and folders. Now let’s take a look and see whether or not the module has been added to EasyApache. Following the steps outlined in the earlier article, navigate to the options page. As you can see in the screenshot below, it has indeed appeared:
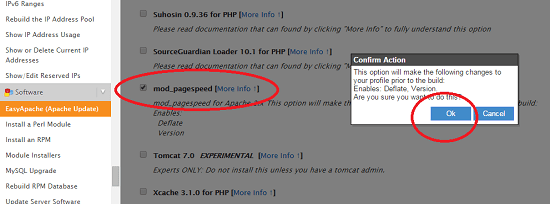
Enable it and confirm the dialog. Since we only wanted to change this one thing without enabling or disabling anything else, simply go to the bottom of the screen and click “Save and Build”.
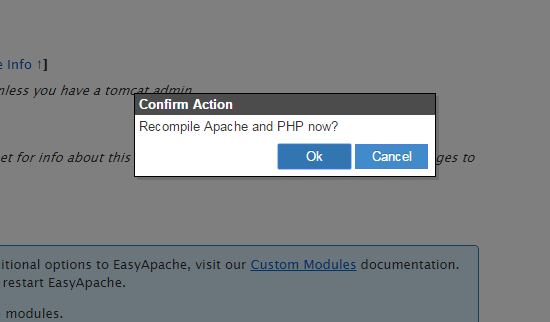
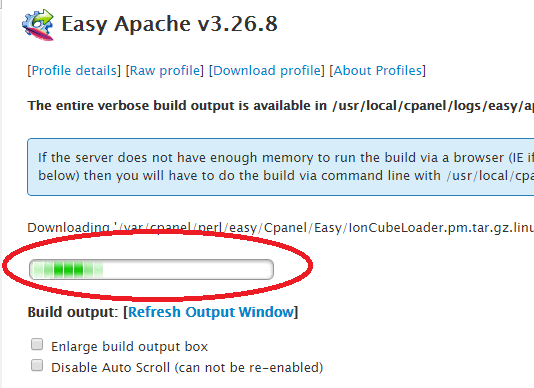
This will recompile both Apache as well as PHP. It can take some time and you can follow the progress on the next screen with the output appearing in the window below:
Now let’s test and see whether or not the mod_pagespeed module has indeed been installed. Using a file explorer of your choice, check the following folder:
/usr/local/apache/conf
Configuration
The defaults for mod_pagespeed are good, but you’ll often find that you can get better performance with a few additional tweaks to your site. Every site will get different results with different settings and it’s best to play around and find the settings that work best for you and your site.
There are a few different ways mod_pagespeed can be configured. You can use the pagespeed.conf file described above to configure it for the whole server. Or, if you’d rather, you can put your configuration settings in the VirtualHost directive for an Apache virtual host/website. Finally, you have the option of specifying directives in a .htaccess file, such as what most sites do for mod_rewrite.
To start editing the main configuration file, use the following command:
vi /usr/local/apache/conf/pagespeed.conf
In general, the settings in pagespeed.conf are pretty well documented inside the file. There is also a great list of filter examples available from http://www.modpagespeed.com. Here are a few common settings you might want to play with to optimize for your site’s performance.
Turn mod_pagespeed On/Off
First off, you can turn the module on or off with the ModPagespeed setting.
ModPagespeed on
or
ModPagespeed off
Rewrite Levels
You can specify different “levels” of settings to simplify any configuration. The default is CoreFilters It contains a set of filters the Google team believes is safe for use. The filters are the individual actions that are applied to a file. In general, you won’t need to change this value. It’s easier to use this default and then enable or disable filters using the ModPagespeedEnableFilters and ModPagespeedDisableFilters directives.
The default setting:
ModPagespeedRewriteLevel CoreFilters
To disable CoreFilters use this setting:
ModPagespeedRewriteLevel PassThrough
Note: You’ll have to explicitly enable any filters you want to turn on using the PassThrough setting.
Using the default “CoreFilters” rewrite level includes a number of filters by default. As of the time of this writing, it includes:?
add_head
combine_css
convert_jpeg_to_progressive
convert_meta_tags
extend_cache
flatten_css_imports
inline_css
inline_import_to_link
inline_javascript
rewrite_css
rewrite_images
rewrite_javascript
rewrite_style_attributes_with_url
New filters will be added in the future. By using CoreFilters, you’ll automatically have these filters enabled if they become part of the default set whenever you update mod_pagespeed. Using PassThrough will require you to explicitly enable the new filters.
Enable Filters
You can have multiple ModPagespeedEnableFilters directives throughout your configuration files. So, if you want to enable a filter per site, you could enable it in the virtual host configuration file or in the .htaccess file instead of in the main pagespeed.conf file.
ModPagespeedEnableFilters rewrite_css,rewrite_js
The following example disables the “Convert JPEG to Progressive” filter even though it’s part of the CoreFilters set:
ModPagespeedDisableFilters convert_jpeg_to_progressive
Specify Which URLs are Rewritten
By default, mod_pagespeed rewrites everything it can. You can disable certain files (for example Javascript libraries) from being rewritten with the following directive:
ModPagespeedDisallow "*/jquery-ui-*.min.js"
This would disable rewriting of any files that match the wildcard pattern specified (jquery UI in this case).
You can also turn off the rewriting of all files by default and only enable files you want to rewrite manually. You can do this with the following settings:
ModPagespeedDisallow "*"
ModPagespeedAllow "http://*linuxtweaks.in/*/styles/*.css"
Restart Apache
Don’t forget if you’re using the pagespeed.conf or VirtualHost files to alter the settings, you’ll have to restart Apache for the settings to take effect. You can do this with the following commands:
service apache2 restart